Koikatsu Unity Porter
This zip has the in-game exporter plugin and all three importer packages for Unity. You only need one of the .unitypackage files, whichever matches your project's render pipeline. Not sure which? Check the Tutorial tab.
Download KKUP_Unity_Porter.zipKKUP_Exporter.dll: the BepInEx plugin. Exports your character to a PMX file from in-game.KKUP_Importer_Built_In.unitypackage: for Unity's Built-in Render Pipeline.KKUP_Importer_URP.unitypackage: for the Universal Render Pipeline.KKUP_Importer_HDRP.unitypackage: for the High Definition Render Pipeline.
The exporter plugin is built on KKBP_Exporter, modified to work with this Unity pipeline. The importer packages here are original, built for Unity rather than Blender.
-
Extract the zip
Pull everything out of
KKUP_Unity_Porter.zipfirst. You should end up withKKUP_Exporter.dlland three.unitypackagefiles. -
Install the exporter plugin
Move
KKUP_Exporter.dllinto your game'sBepInEx/pluginsfolder. On a Steam install that's usually...\SteamLibrary\steamapps\common\Koikatsu Party\BepInEx\plugins, though your drive or install path might be different.This assumes BepInEx itself is already set up and your other plugins are loading. If you haven't modded the game before, get that working first with something like KKManager or an HF Patch before adding this one.
-
Export your character
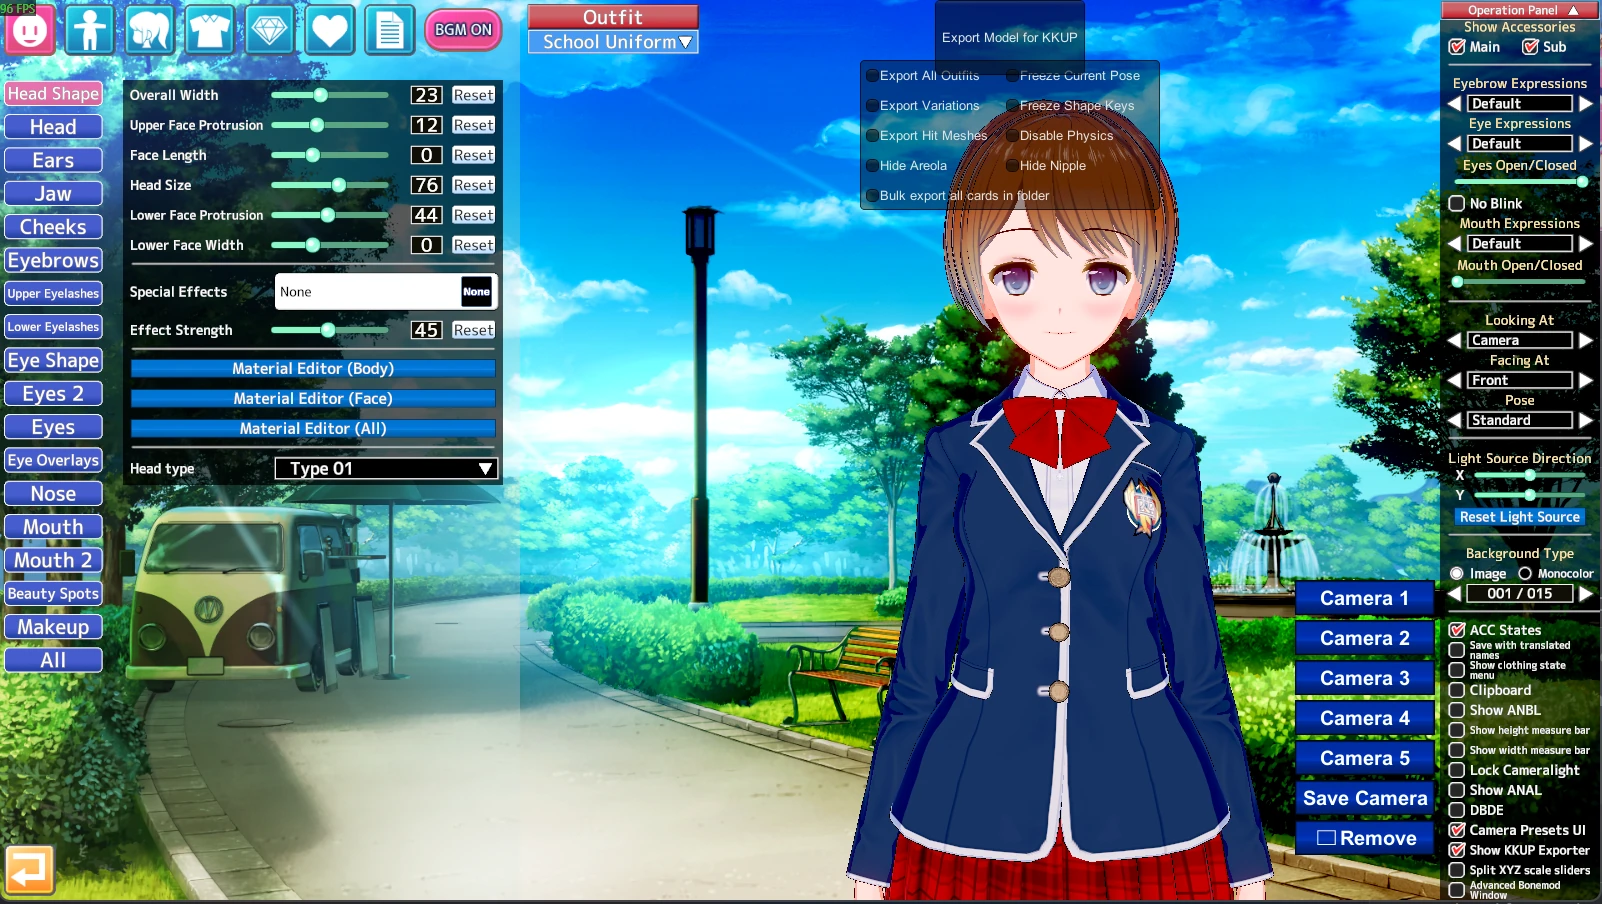
Launch the game and open a character. In the Operation Panel on the right, check Show KKUP Exporter. That adds an "Export Model for KKUP" button above the character.
Before you export, check Freeze Current Pose in that export panel. Without it, the mesh can come out distorted since it exports whatever pose the character happens to be holding.
-
Check your render pipeline
In Unity, go to Edit → Project Settings → Graphics and look at Scriptable Render Pipeline Settings: empty means Built-in, otherwise the asset's name tells you URP or HDRP. That's which
.unitypackageyou need from the Downloads tab. -
Import the matching package
Either use Assets → Import Package → Custom Package… and pick the one that matches your pipeline, or just drag the
.unitypackagefile straight into your Project window. Both do the same thing.On first import it'll ask to install the FBX Exporter dependency. Click Install. If you click out of that instead, it won't ask again on its own, you'd have to bring it back from Tools → KkPmx Importer → Check FBX Exporter Dependency.
-
Run the importer
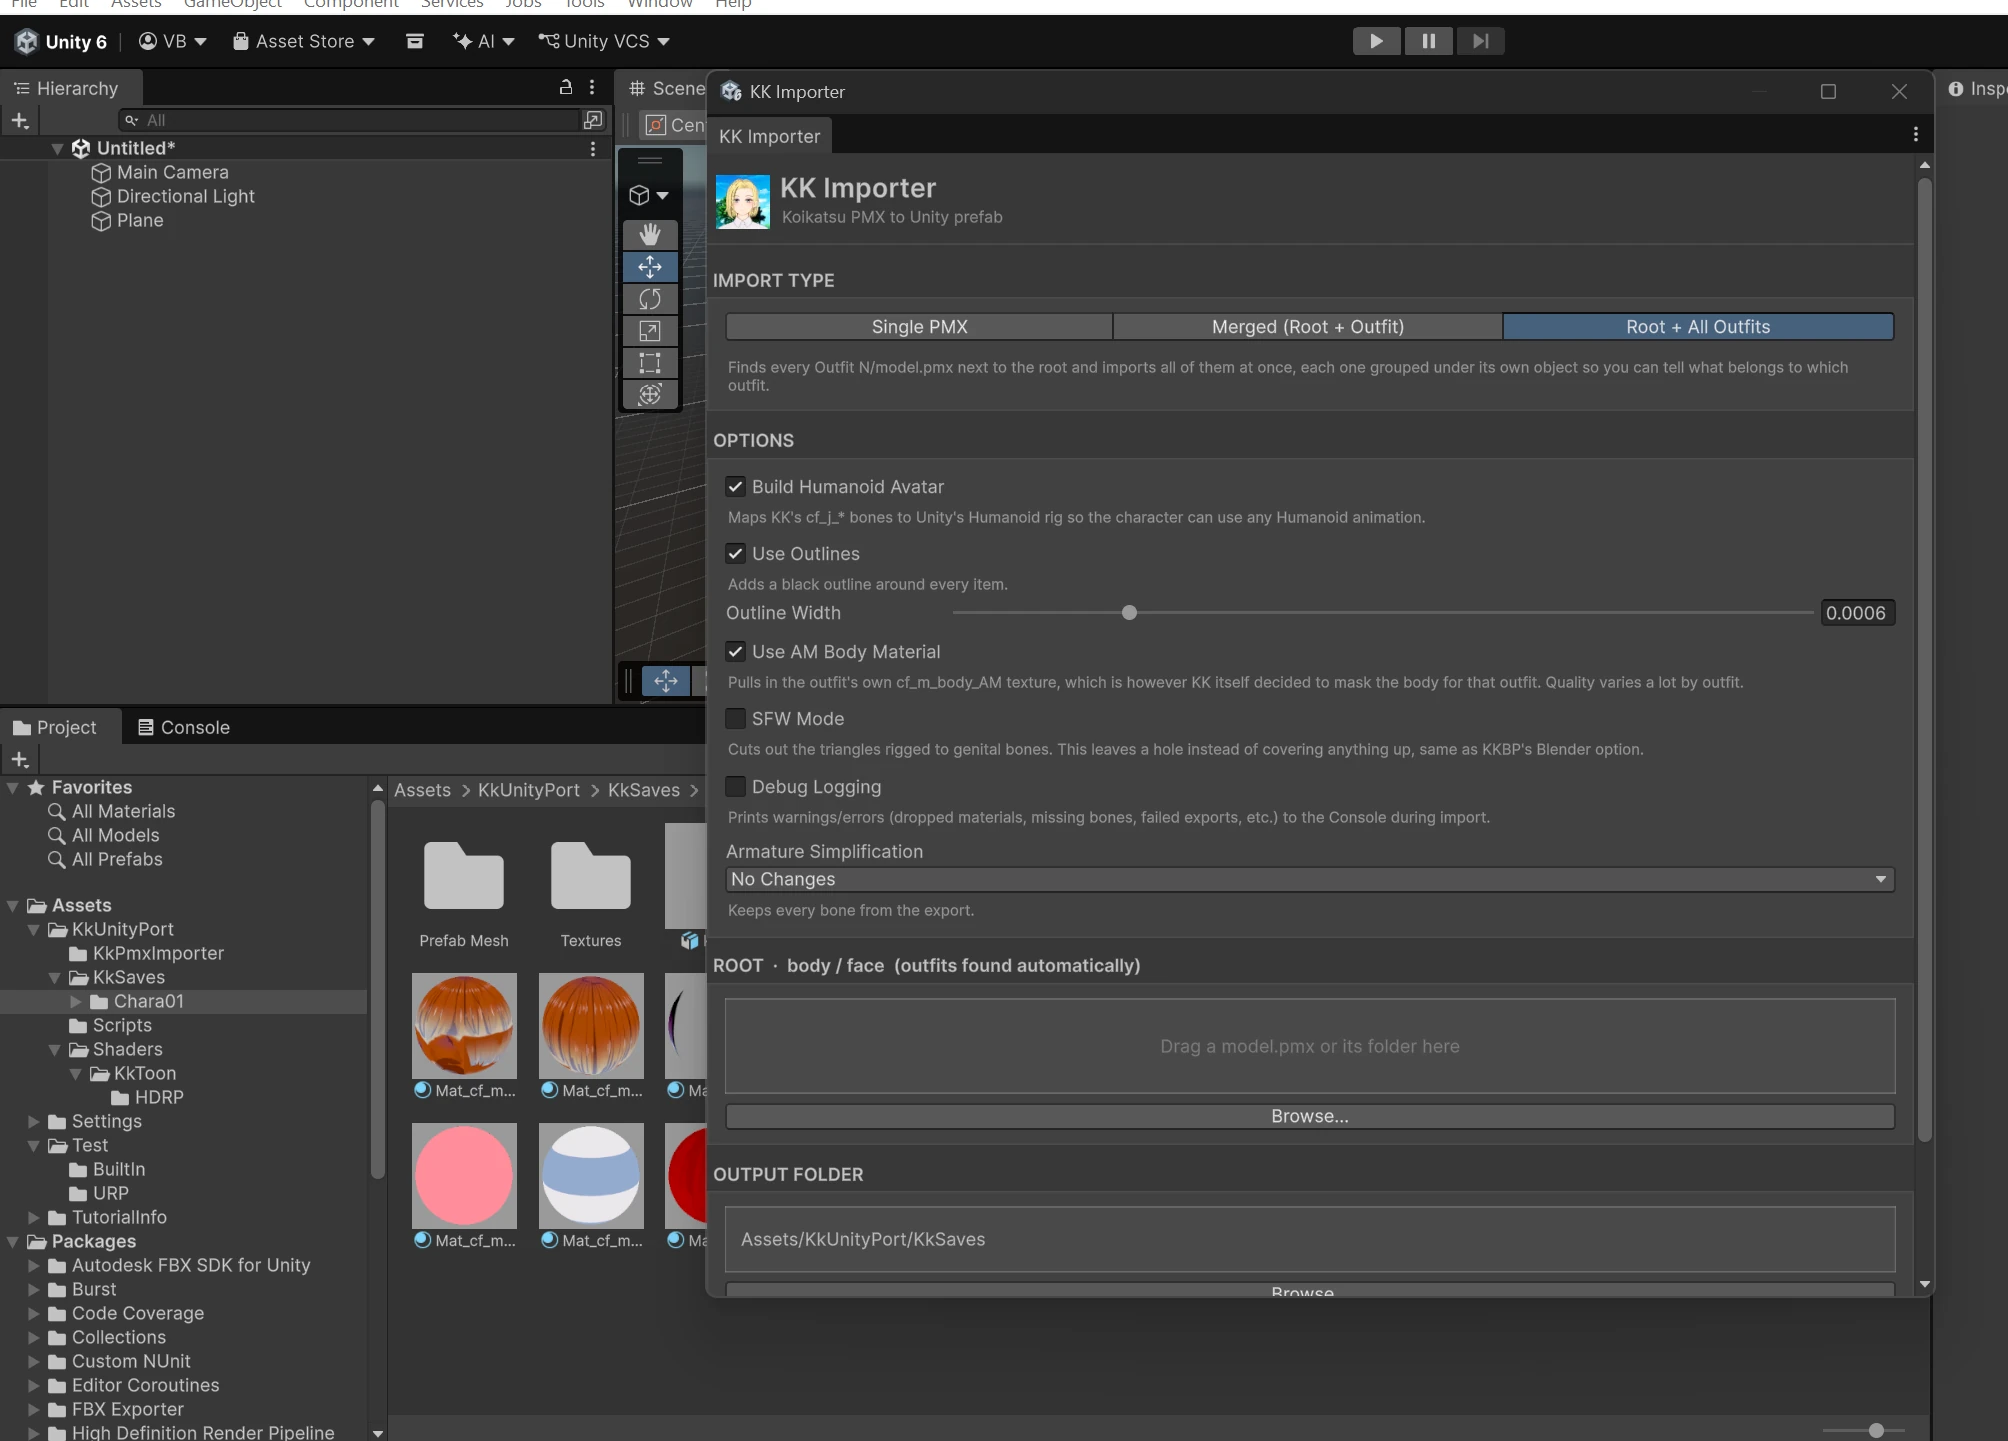
Open Tools → KK Importer, then drag in your exported
.pmxfile (or the folder it's in).Worth knowing what a couple of the options do before you hit import. Single PMX is for just the body/face export on its own, no clothes. Merged (Root + Outfit) combines that root with one outfit's hair and clothes into one character. Root + All Outfits grabs every outfit you exported at once and keeps them grouped separately, so you're not stuck redoing this per outfit.
Build Humanoid Avatar sets the character up for Mecanim animations, leave it on unless you specifically don't want that. Use Outlines gives you the black cel-shading outline. Use AM Body Material uses the outfit's own body coverage mask so skin doesn't show through where it shouldn't, though the quality of that mask depends on the outfit, some look better than others. Armature Simplification can strip out extra jiggle/deform bones if you want a lighter rig, the default of keeping everything is fine for most people.
-
Fix the Humanoid Avatar's T-pose, if you need one
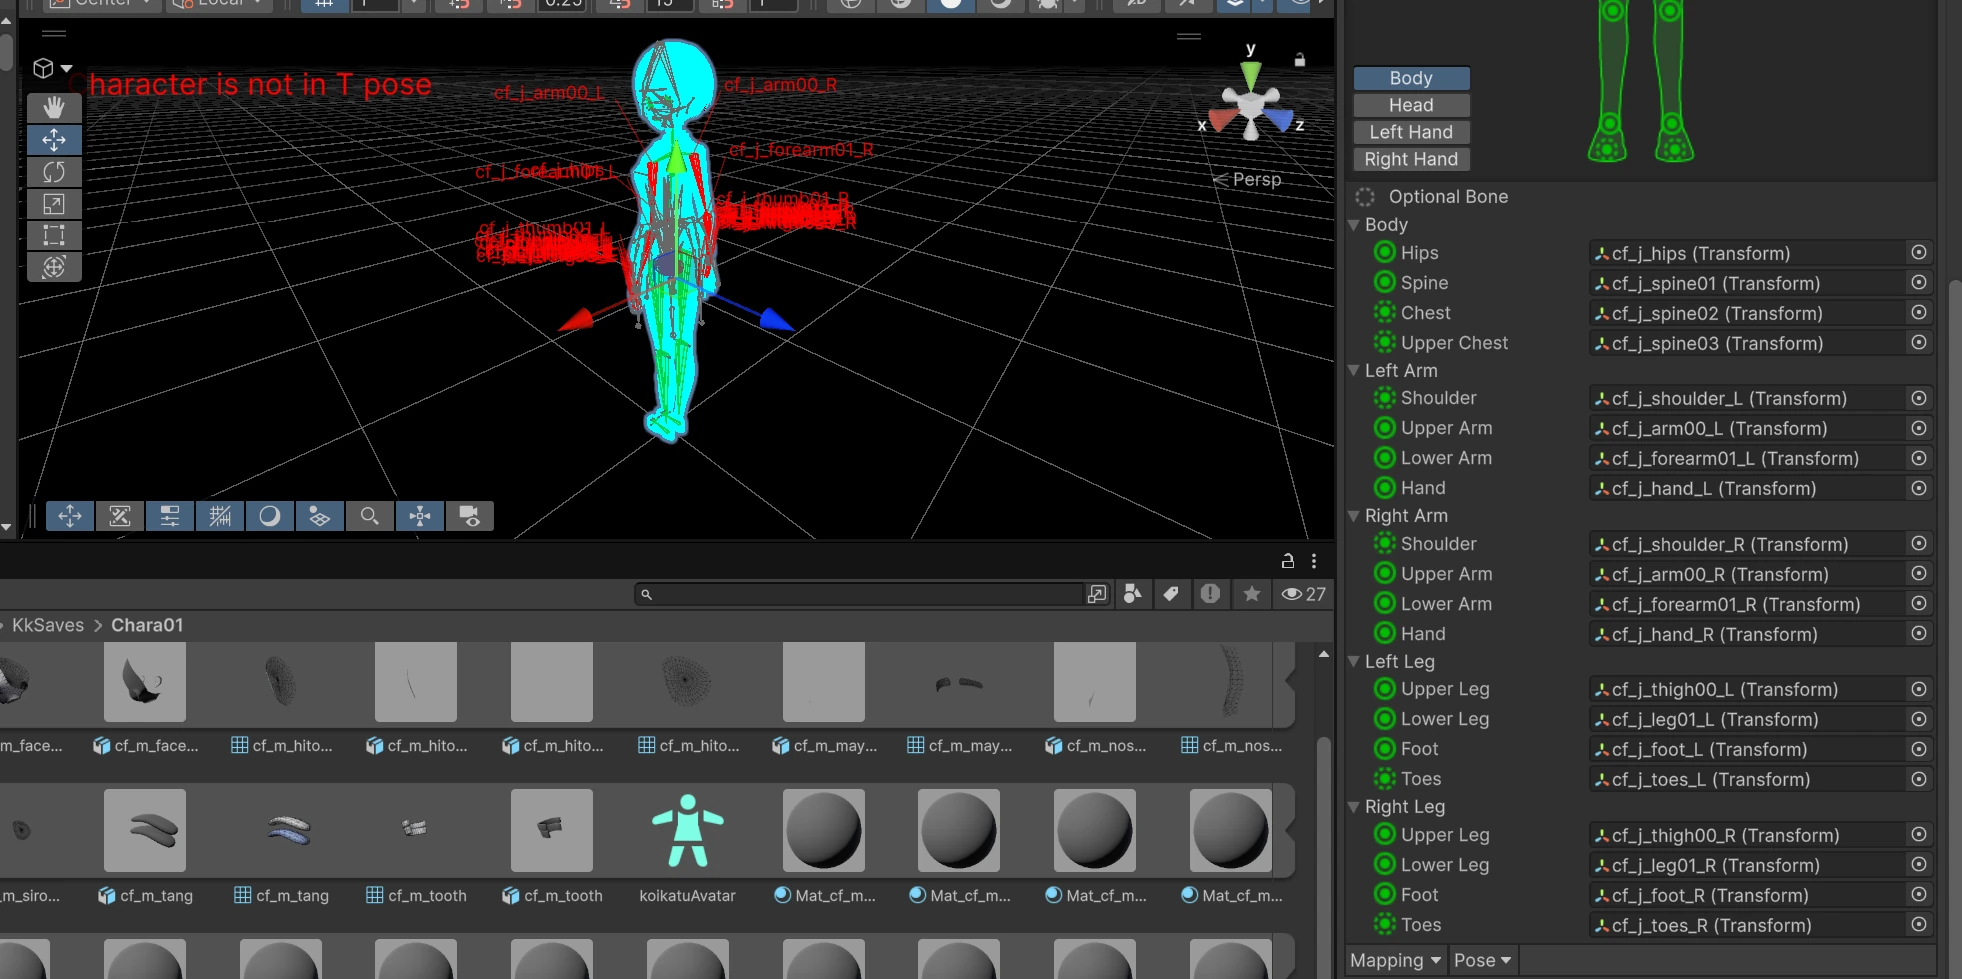
If you want to use Humanoid animations, open the generated Avatar and check its configuration. It'll probably tell you the character isn't in a T-pose.
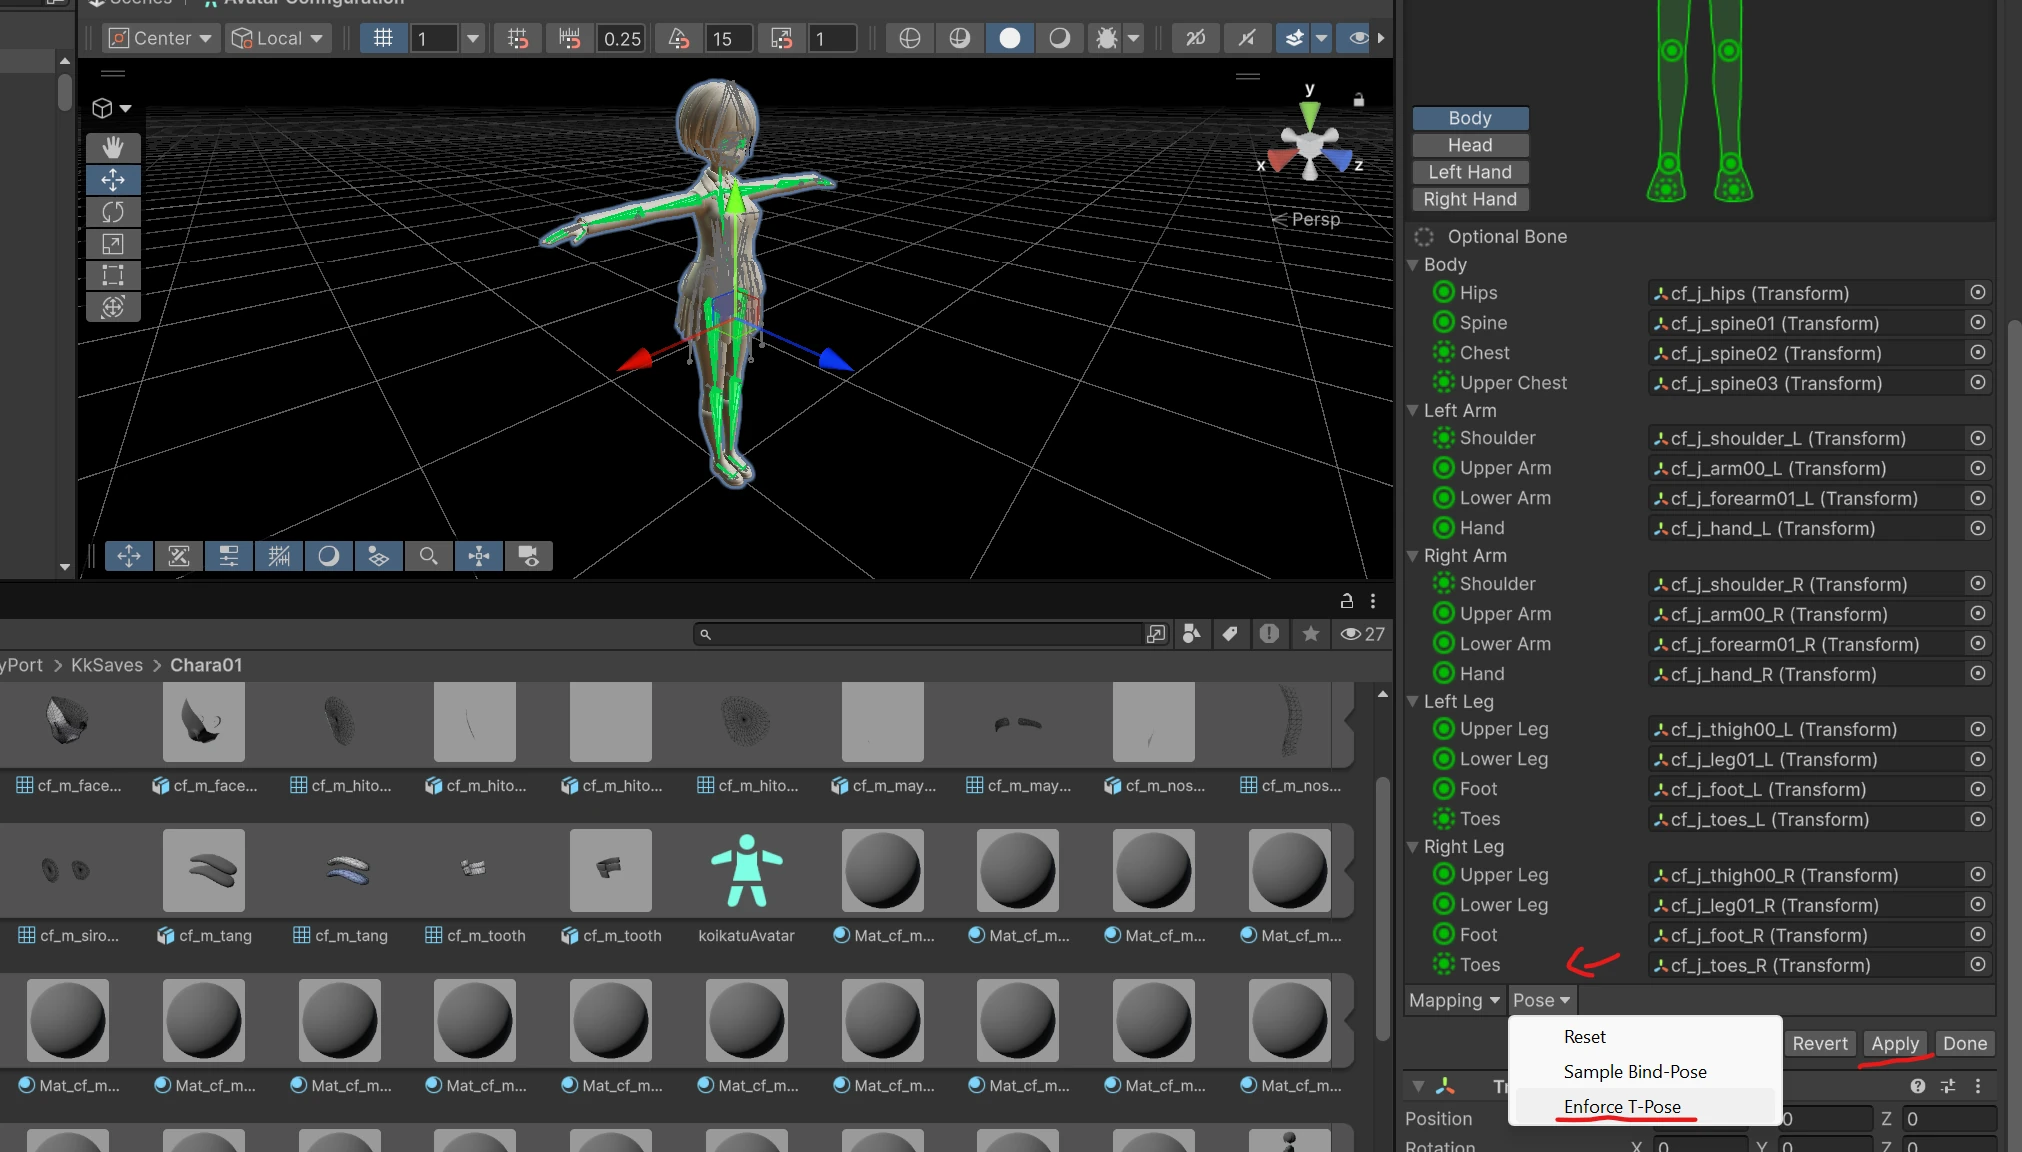
Open the Pose dropdown at the bottom of the window, choose Enforce T-Pose, then hit Apply. That fixes it. If something still looks off after that, that's when it's worth going in and adjusting bones by hand.
Discord
Questions about the importer, export problems, or just want to show off what you made? Come hang out in the Discord. It's also where I post updates before anything makes it onto this page.
Join the Discord